Static Hosting with Amazon S3 and Cloudfront

The decision of moving from a "Standard" Web hosting to a Static Hosting is influenced mainly by two facts.
- Performance.
- Cost.
Static hosting allows us to serve a blazing fast service, at a very low budget. Not all applications are suitable for static hosting, and not all the factors in static hosting are advantages. But is a great option to consider when developing our website and when looking for a reliable and cost-effective hosting provider.
Amazon Web Services
Amazon Web Services or AWS offers a great variety of services with a great performance and security factor at a very competitive price.

At the time this post was written, 128 Services are available for any type of service (Storage, Computing, Databases, Code Repositories, CI/CD, Distribution, Artificial Intelligence, Mailing, Notifications, and a very large etcetera.)
Amazon does have a Free Tier, allowing us to try near to all its services for free. You can find more information at: Amazon Free Tier.
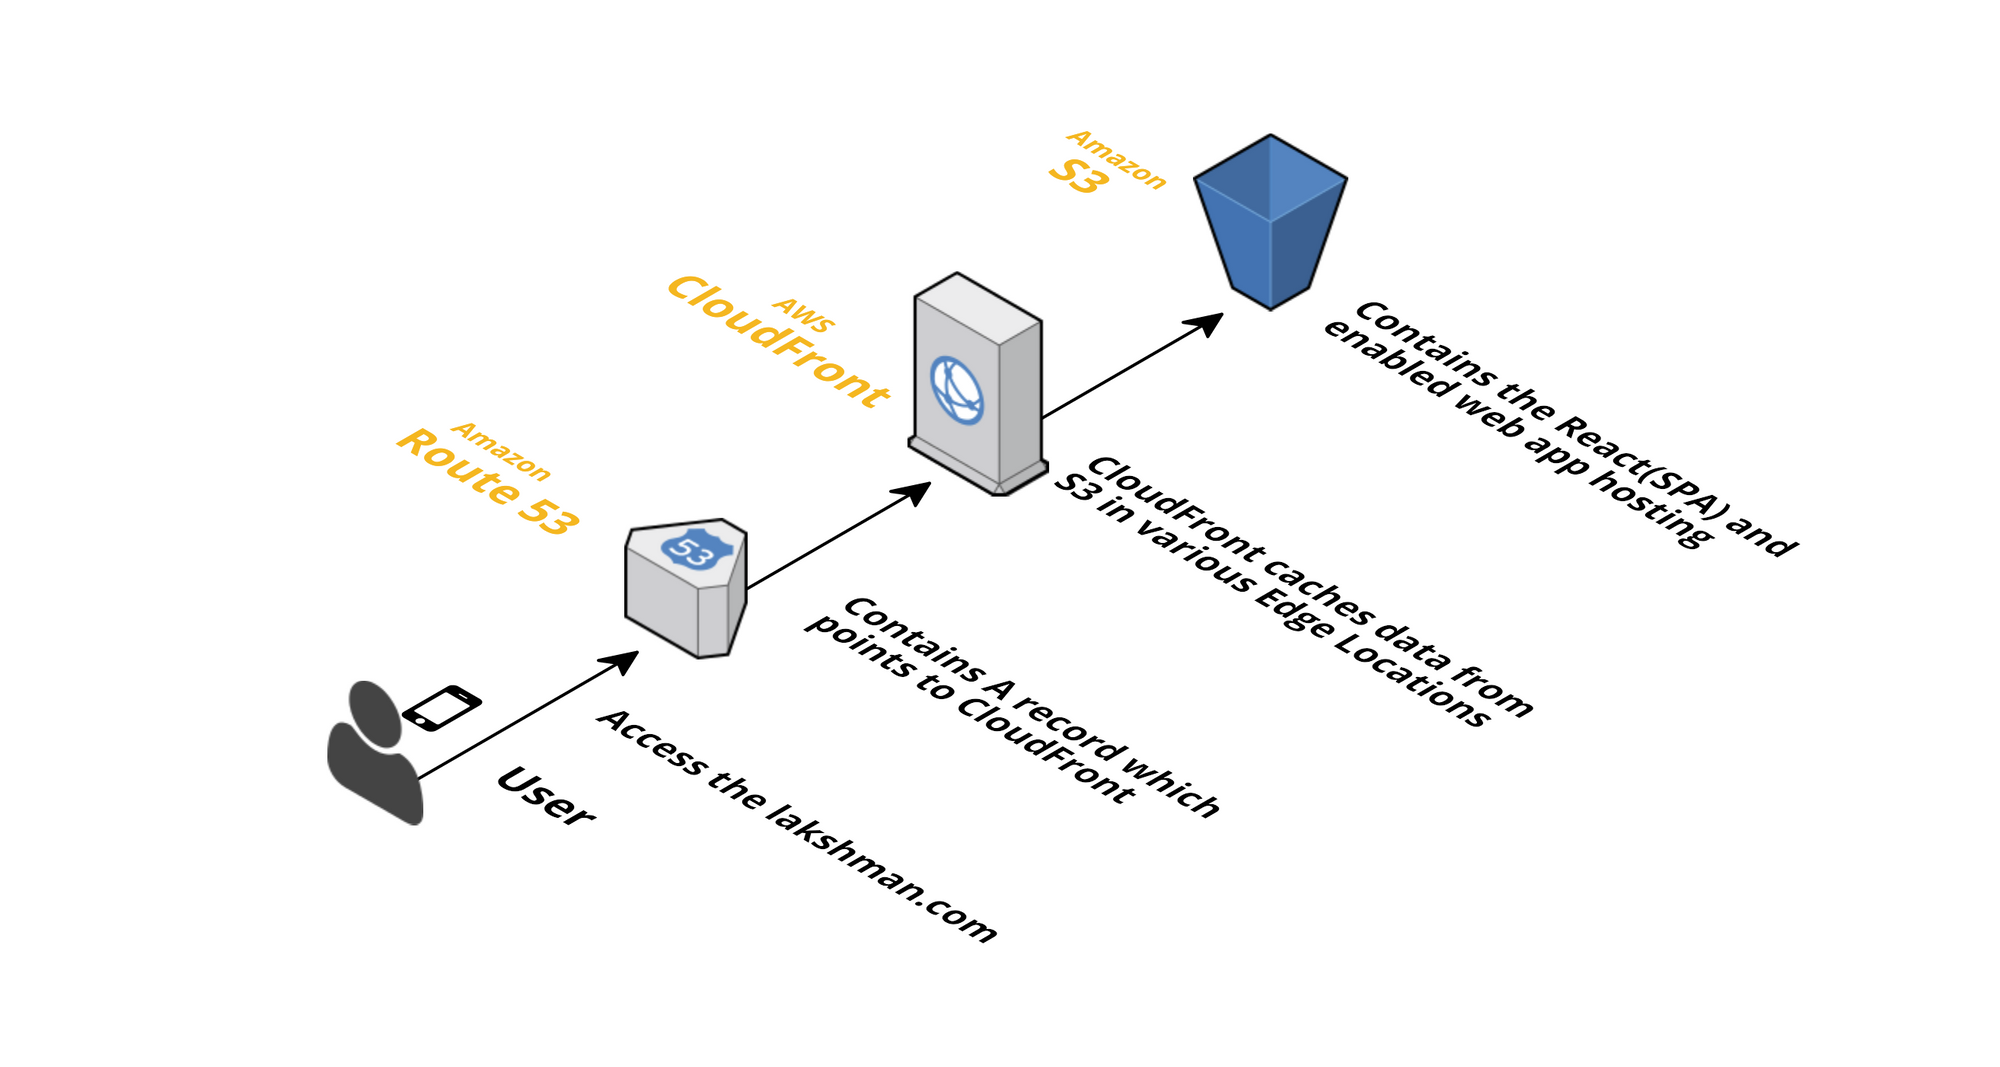
Today, we will be focusing on two services: Amazon S3 and Amazon CloudFront. Both will allow us to store and distribute worldwide our website with our own configuration and restrictions.
Getting Started
First, we will require to create our own AWS Developer Account. You have to create one by clicking here.
Once we have our own account with all the billing data saved. Web can start setting up our static hosting with Amazon S3.
Setting Up S3
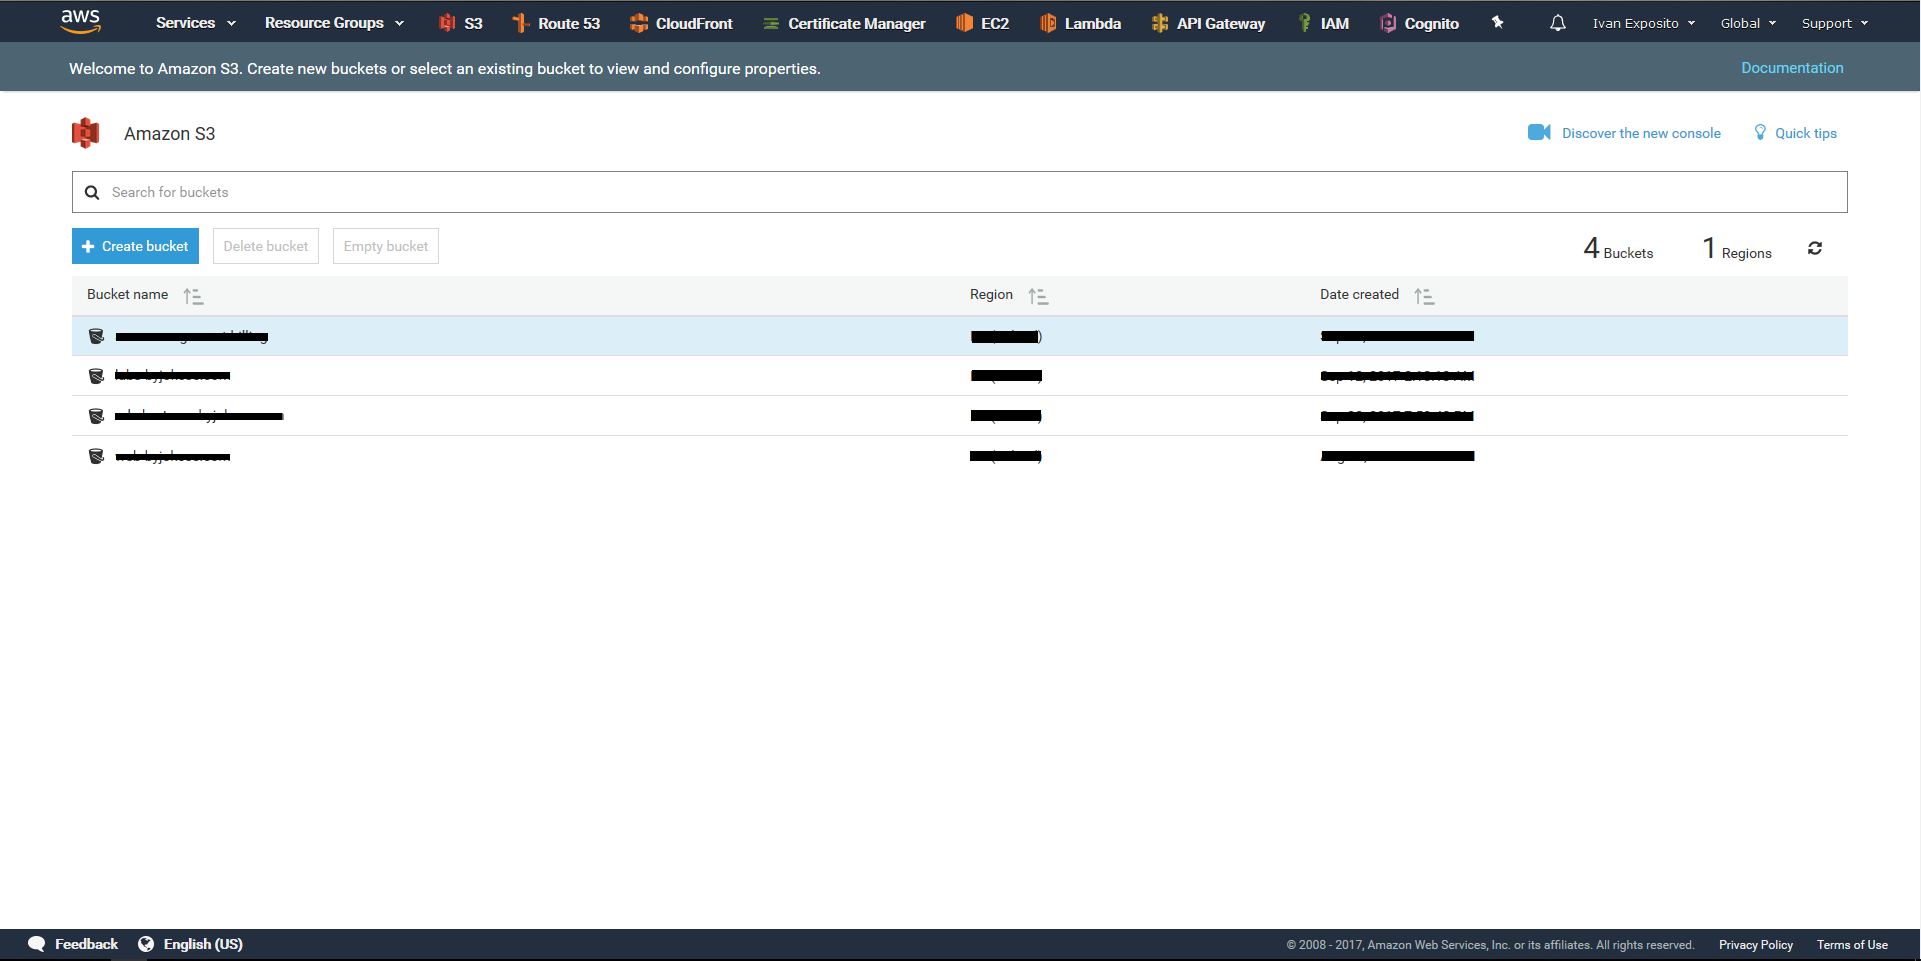
On our AWS Dashboard, will head to Services, and search for Amazon S3. If we haven't worked previously with S3, click on Get started button. Amazon S3 Dashboard will show all the buckets that we own and will give us the ability to create or edit already existing ones.
Amazon Buckets are unique containers where we can store our files.
Click over the Create Button. A modal will popup allowing us to insert the name and the region where our data will be stored. Amazon S3 bucket names are globally unique, regardless of the AWS Region in which you create the bucket.
Click Next and leave all the properties as default, unless you are interested on them. Head to Set Permission page by clicking Next again. Leave permissions as default, we will be modifying them from another menu.
Review all the parameters and click Create Bucket.
Click on the created bucket and head to Properties Tab. There, click on Static website hosting. And fill the data as shown in the image below:
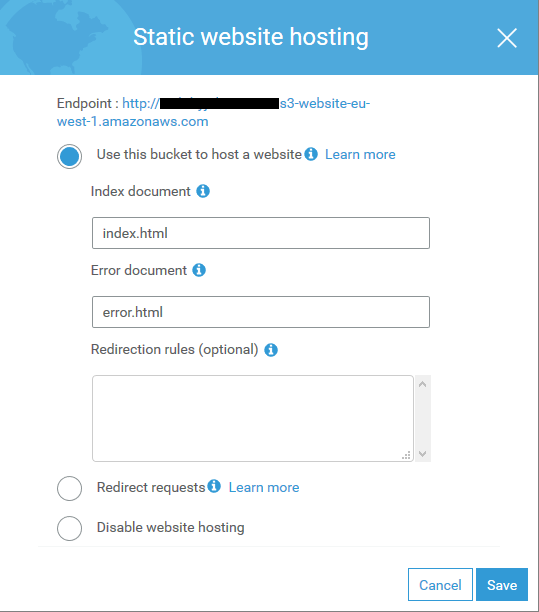
This will give us an Endpoint what will act as our URL for accessing our site temporarily until we set up our domain name. Click on Save. And head to Overview tap. There you can upload the files for your website.
Congrats, at this point you have successfully set up a static website with Amazon S3.
Setting Up CloudFront
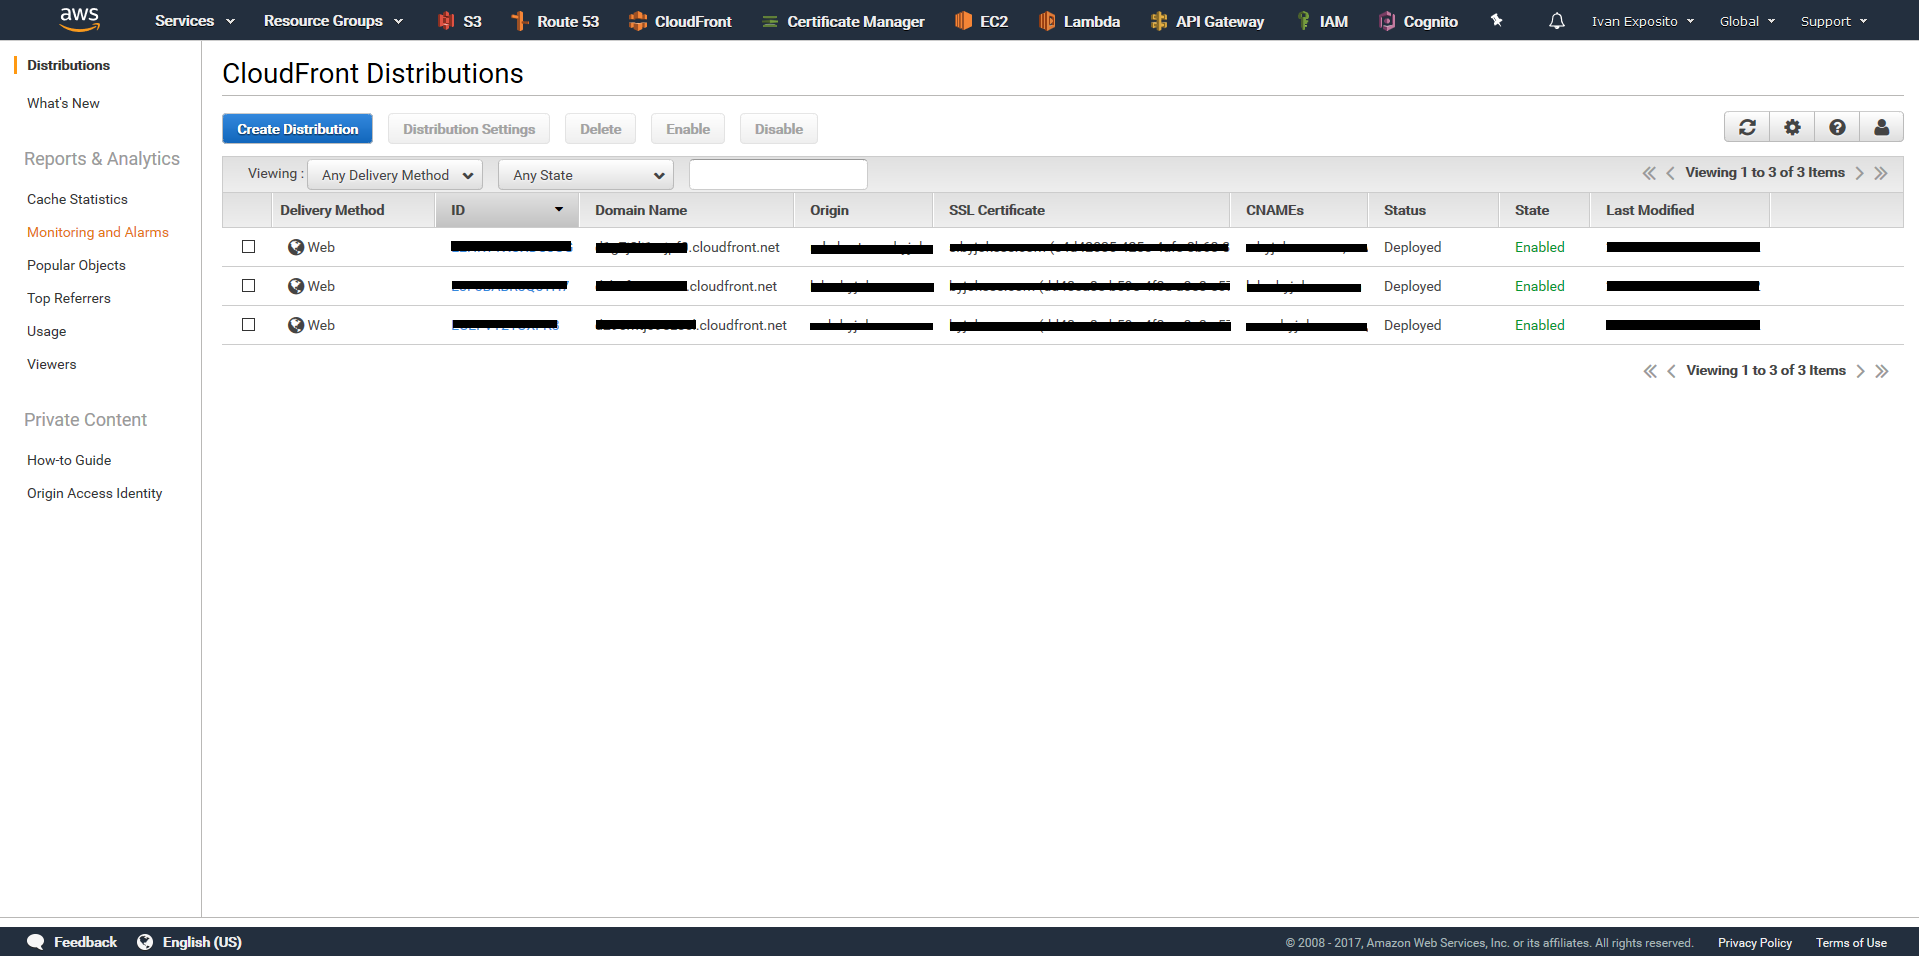
Go to Services on the AWS Dashboard and search for Amazon CloudFront, this will allow us to set up a worldwide distribution and cache as well as our domain name.
Click on Create Distribution and select the Get Started Button under Web delivery method. Fill the Form with the following fields:
- Origin Domain Name: Select the previously created S3 Bucket.
- Origin Path: Select the root directory under your S3 Bucket folders system. (Leave empty if is root or set an '/').
- Origin ID: Will be automatically filled when selecting the S3 Bucket.
Configure the default cache behavior settings as your preference.
On Distribution Settings, select a custom SSL Certificate previously created from Amazon Certificate Manager, which is free. Or just leave the standard CloudFront Certificate.
The rest of the parameters can be left as default, or modified at your own risk.
There's a Full tutorial that can be read at the official AWS Documentation.
Once our distribution is created will with us a custom domain name like: xxxxxxxxxxxxxx.cloudfront.net being x a letter or number.
Setting Up our Custom Domain Name
Once we have our domain name from Amazon Route 53 or any other domain name provider, we will set up a CNAME entry at our DNS table with our domain name and the Endpoint given by CloudFront.
On future posts, we will analyze the cost and performance from a static website hosted on AWS using S3 + CloudFront + Route 53.